Spring is the most popular open source java application framework as
of current moment. It is one of the best job enablers too (at least in
Indian software services companies).
Before starting on spring framework, I recommend you to become strong
in core-java first, then remember to study servlets, jsp and then start
on Spring framework.
Spring framework provides multiple modules wherein MVC and Inversion
of Control container are popular among them. In this article I will
present a spring MVC based Hello World web application.
I am using Spring version 3 latest available now.
SpringSource provides a tool suite (STS) IDE which is based on Eclipse to develop Spring based applications. But, my personal choice for now is to continue with Eclipse JEE IDE.
Model View Controller (MVC)
Model view controller is a software architecture design pattern. It
provides solution to layer an application by separating three concerns
business, presentation and control flow. Model contains business logic,
controller takes care of the interaction between view and model.
Controller gets input from view and coverts it in preferable format for
the model and passes to it. Then gets the response and forwards to view.
View contains the presentation part of the application.
Spring MVC
Spring MVC is a module for enabling us to implement the MVC pattern. Following image shows the Spring’s MVC architecture
DispatcherServlet
This class is a front controller that acts as central dispatcher for
HTTP web requests. Based on the handler mappings we provide in spring
configuration, it routes control from view to other controllers and gets
processed result back and routes it back to view.
Control Flow in Spring MVC
- Based on servletmapping from web.xml request gets routed by servlet container to a front controller (DispatcherServlet).
- DispatcherServlet uses handler mapping and forwards the request to matching controller.
- Controller processes the request and returns ModeAndView back to
front controller (DispatcherServlet). Generally controller uses a
Service to perform the rules.
- DispatcherServlet uses the view resolver and sends the model to view.
- Response is constructed and control sent back to DispatcherServlet.
- DispatcherServlet returns the response.
Spring 3 MVC Sample
Software versions used to run the sample code:
- Spring 3
- Java 1.6
- Tomcat 7
- JSTL 1.2
- Eclipse Java EE IDE
Web Application Structure
Use Java EE perspective and create a new dynamic web project. Let us start with web.xml

web.xml
In web.xml primarily we are doing
servlet mapping to give configuration for DispatcherServlet to load-on-startup and defining spring configuration path.
<?xml version="1.0" encoding="UTF-8"?>
<web-app xmlns:xsi="http://www.w3.org/2001/XMLSchema-instance"
xmlns="http://java.sun.com/xml/ns/javaee"
xmlns:web="http://java.sun.com/xml/ns/javaee/web-app_2_5.xsd"
xsi:schemaLocation="http://java.sun.com/xml/ns/javaee http://java.sun.com/xml/ns/javaee/web-app_2_5.xsd"
id="WebApp_ID" version="2.5">
<display-name>Spring Hello World</display-name>
<welcome-file-list>
<welcome-file>/</welcome-file>
</welcome-file-list>
<servlet>
<servlet-name>springDispatcher</servlet-name>
<servlet-class>
org.springframework.web.servlet.DispatcherServlet
</servlet-class>
<init-param>
<param-name>contextConfigLocation</param-name>
<param-value>/WEB-INF/config/spring-context.xml</param-value>
</init-param>
<load-on-startup>1</load-on-startup>
</servlet>
<servlet-mapping>
<servlet-name>springDispatcher</servlet-name>
<url-pattern>/</url-pattern>
</servlet-mapping>
</web-app>
|
Spring Configuration
This spring configuration file provides context information to spring container. In our case,
The tag mvc:annotation-driven says that we are using annotation based
configurations. context:component-scan says that the annotated
components like Controller, Service are to be scanned automatically by
Spring container starting from the given package.
<?xml version="1.0" encoding="UTF-8"?>
<beans xmlns="http://www.springframework.org/schema/beans"
xmlns:xsi="http://www.w3.org/2001/XMLSchema-instance" xmlns:mvc="http://www.springframework.org/schema/mvc"
xmlns:context="http://www.springframework.org/schema/context"
xsi:schemaLocation="
http://www.springframework.org/schema/mvc http://www.springframework.org/schema/mvc/spring-mvc-3.0.xsd
http://www.springframework.org/schema/beans http://www.springframework.org/schema/beans/spring-beans-3.0.xsd
http://www.springframework.org/schema/context http://www.springframework.org/schema/context/spring-context-3.0.xsd">
<context:component-scan base-package="com.nataraz2java.spring.mvc" />
<mvc:annotation-driven />
<bean
class="org.springframework.web.servlet.view.InternalResourceViewResolver">
<property name="prefix" value="/WEB-INF/view/" />
<property name="suffix" value=".jsp" />
</bean>
</beans>
|
Library files needed
- commons-logging.jar
- org.springframework.asm-3.1.2.RELEASE.jar
- org.springframework.beans-3.1.2.RELEASE.jar
- org.springframework.context-3.1.2.RELEASE.jar
- org.springframework.core-3.1.2.RELEASE.jar
- org.springframework.expression-3.1.2.RELEASE.jar
- org.springframework.web.servlet-3.1.2.RELEASE.jar
- org.springframework.web-3.1.2.RELEASE.jar
- javax.servlet.jsp.jstl-1.2.1.jar (http://jstl.java.net/download.html -> JSTL Implementation)
These jars are part of standard spring framework download except the jstl.
Controller
Following controller class has got methods. First one hello maps to
the url ‘/’. Annotation has made our job easier by just declaring the
annotation we order Spring container to invoke this method whenever this
url is called. return “hello” means this is used for selecting the
view. In spring configuration we have declared
InternalResourceViewResolver and have given a prefix and suffix. Based
on this, the prefix and suffix is added to the returned word “hello”
thus making it as “/WEB-INF/view/hello.jsp”. So on invoking of “/” the
control gets forwarded to the hello.jsp. In hello.jsp we just print
“Hello World”.
org.springframework.web.servlet.view.InternalResourceViewResolver
|
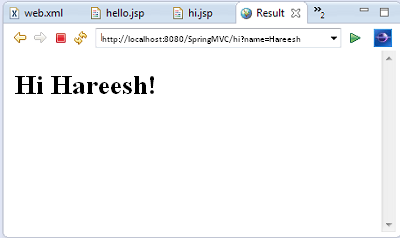
Added to printing Hello World I wanted to give you a small bonus with
this sample. Just get an input from user and send a response back based
on it. The second method “hi” serves that purpose in controller. It
gets the user input and concatenates “Hi” to it and sets the value in
model object. ‘model’ is a special
hashmap
passed by spring container while invoking this method. When we set a
key-value pair, it becomes available in the view. We can use the key to
get the value and display it in the view which is our hi.jsp. As
explained above InternalResourceViewResolver is used to resole the view.
package com.nataraz2java.spring.mvc;
import org.springframework.stereotype.Controller;
import org.springframework.ui.Model;
import org.springframework.web.bind.annotation.RequestMapping;
import org.springframework.web.bind.annotation.RequestMethod;
import org.springframework.web.bind.annotation.RequestParam;
@Controller
public class HelloWorldController {
@RequestMapping("/")
public String hello() {
return "hello";
}
@RequestMapping(value = "/hi", method = RequestMethod.GET)
public String hi(@RequestParam("name") String name, Model model) {
String message = "Hi " + name + "!";
model.addAttribute("message", message);
return "hi";
}
}
|
View – Hello World
<html>
<head>
<title>Home</title>
</head>
<body>
<h1>Hello World!</h1>
<hr/>
<form action="hi">
Name: <input type="text" name="name"> <input type="submit" value="Submit">
</form>
</body>
</html>
|
Use key “message” in model to get the value and print it.
<%@ taglib uri="http://java.sun.com/jsp/jstl/core" prefix="c" %>
<%@ page session="false" %>
<html>
<head>
<title>Result</title>
</head>
<body>
<h1><c:out value="${message}"></c:out></h1>
</body>
</html>
|
Hello World Output


0 comments:
Post a Comment